fysetc bambulab x1 x1c x1e led upgrade set 3d printer access P | Shop The World
From USA
NewFYSETC
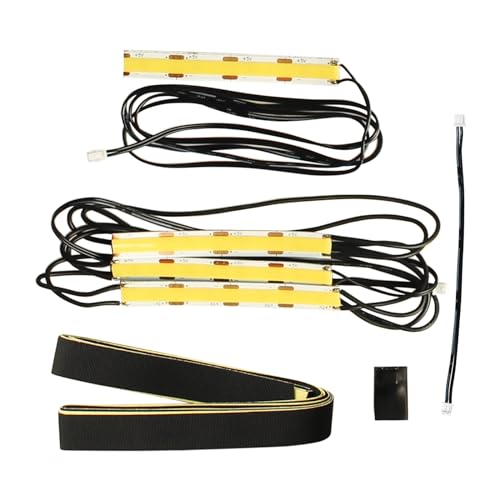
FYSETC Bambulab X1 X1C X1E LED Upgrade Set - 3D Printer Accessories: COB Lampp 5V 12W 3 Section 2.9 inch Length Strip Light - 1 Section with Y Adapter Fit Build in Light - Plug and Play
ℹ
Products from the USA may come with an input voltage of 110V–120V, requiring a step-down transformer. Check the device wattage to select the correct power converter.
•1. Definitely an upgrade for original light: It's completely plug and play nothing else, of course, you can print a few magnetic wire clips or use electrical tape to keep the wires tidy. These LEDs allow more light on your projects while 3-D printing in the lab X1 carbon. The connector doesn't fit most popular printers unless you know how to change the connector, then also fit A1 mini MK2 MK3S+ MK4 SV06 SV07 A8 Ender 3 5 cr10 cr6 se k1 max kobra 2 5M Pro Neptune3 4 voro2.4 Aquil S3 X-Plus etc.
•2. Give you Options: Package includes One segment COB light strip + 3 section COB lamp strips + 1Pcs Y-splitter + some black electrical tape. Two installed choices - If you wanna use with the existing in-unit light, please use our one section light with y splitter adapter(this install choice will solve the cast a bit of extruder shadow); if don't like it, please remove the built in LED strip and reinstall our 3 sections light strip (this install choies can let the install position more free).
•3. Light UP your machine's charmber: Gives much more light then oem light. Don’t worry about the placement you’ll be looking like a sport stadium as long as you space everything out. Tested with lidarr and autocalibration without any issues. Way better than just the OEM light and the option to use both is awesome. If your machine is P1P or P1S, great, we also have the customized led light strip, search ASIN: B0D5B4W3DH at our store.
•4. Better than OEM light, The pin connector is the same as the built in. so it was plug and play for the most part. All you have to do is decide exactly where you want the and remove the adhesive backing and stick them on. Comes with some harness tape that high temp resistant and blends in well, It will ensure that nothing drops down and gets tangled.
•5. Fairly quick to install, less then 10 mins: Plugs right into the printers power port for the official light bar, can be turned on and off from the Bambuu Studio application.
 From USA